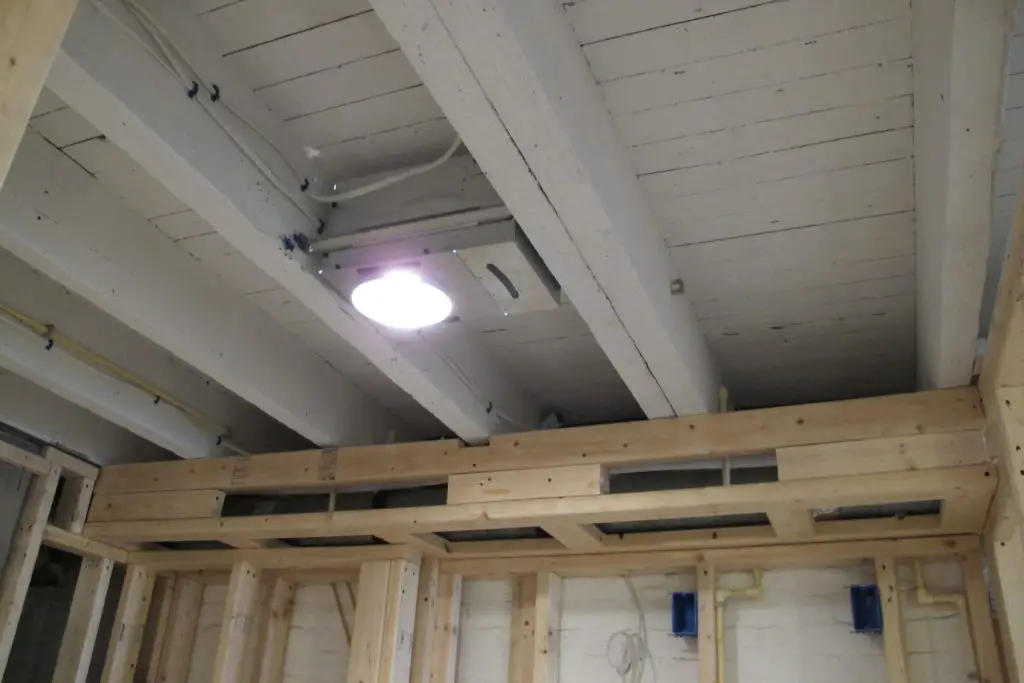
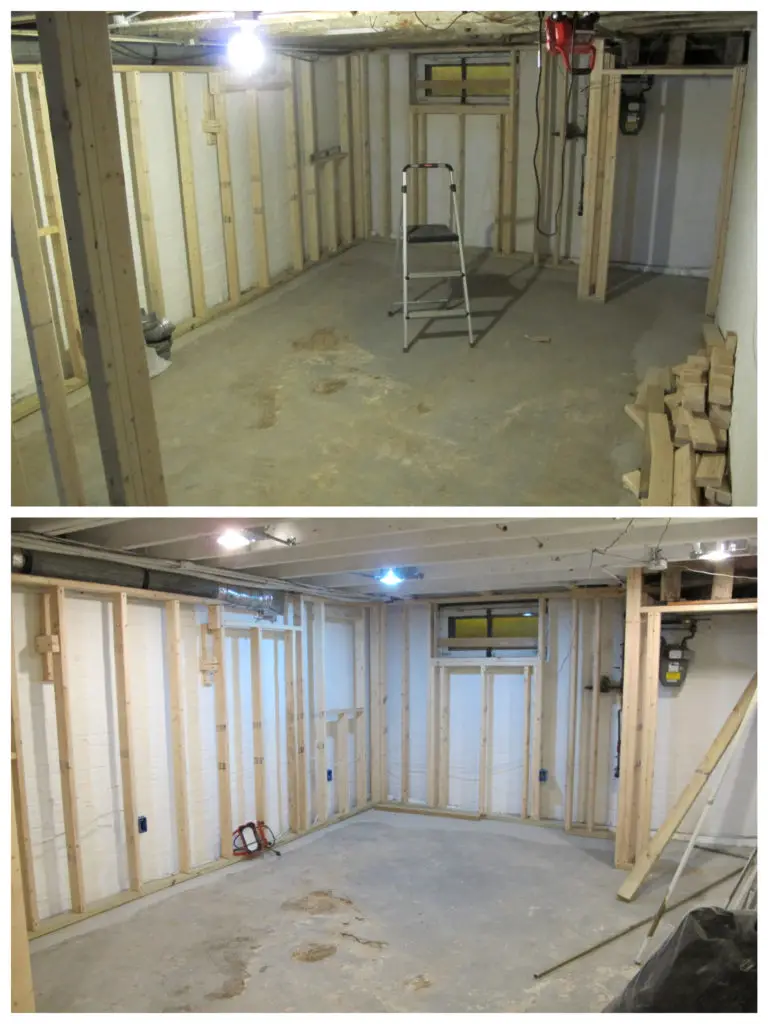
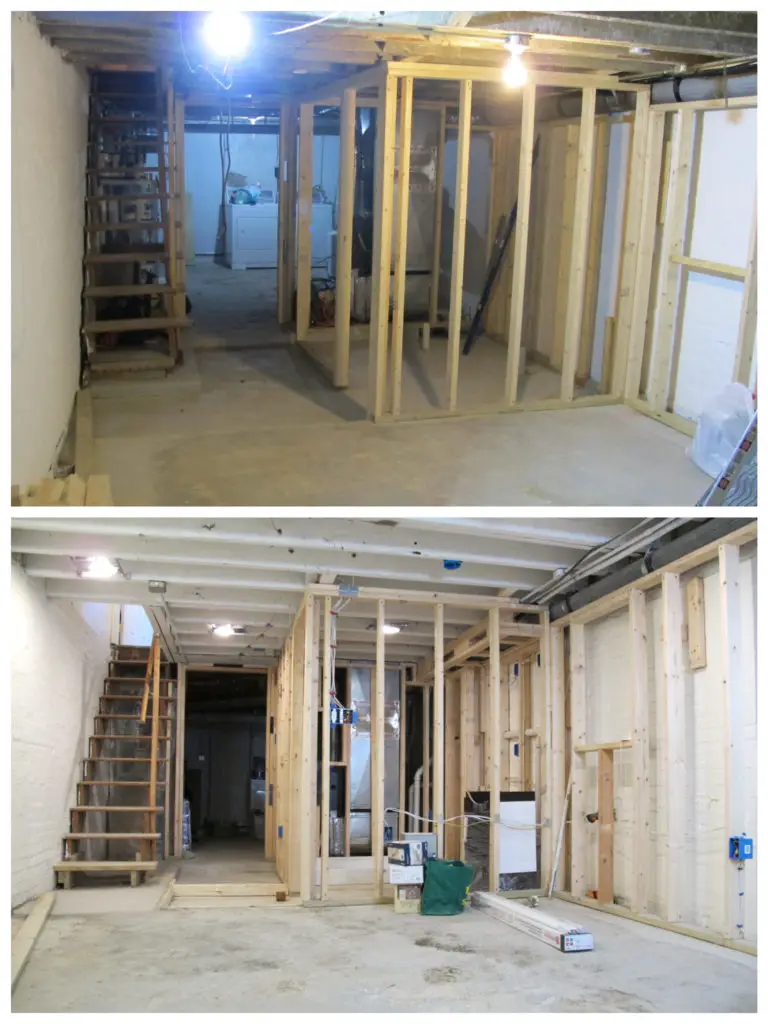
With the basement cleared out, the master plan in mind, and the plumbing and waterproofing drains in place, it was on to the next step: framing and electrical.
DISCLAIMER: This post contains ads and affiliate links. At no additional cost to you, we may receive a commission for purchases made through these links and ads.
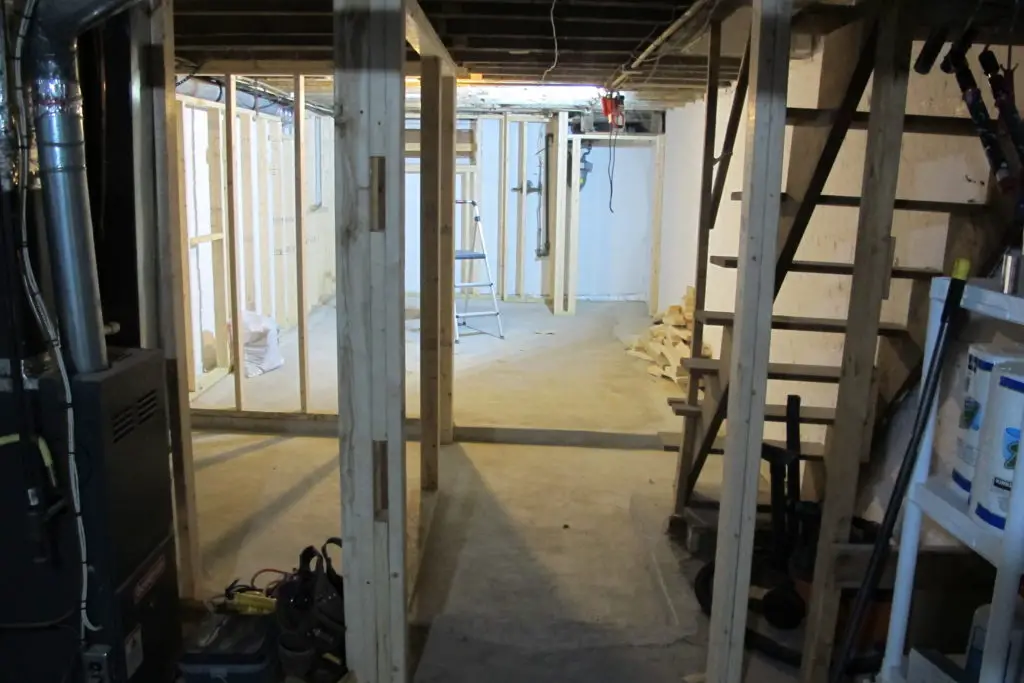
It’s no secret that I hired a contractor to do a majority of the basement project. And from day one, when the framing went up, I knew that I had made the right decision. For me, figuring out how to properly frame around the various obstacles would have been like trying to solve a rubix cube: totally doable, but not without messing up, starting over and messing up again.
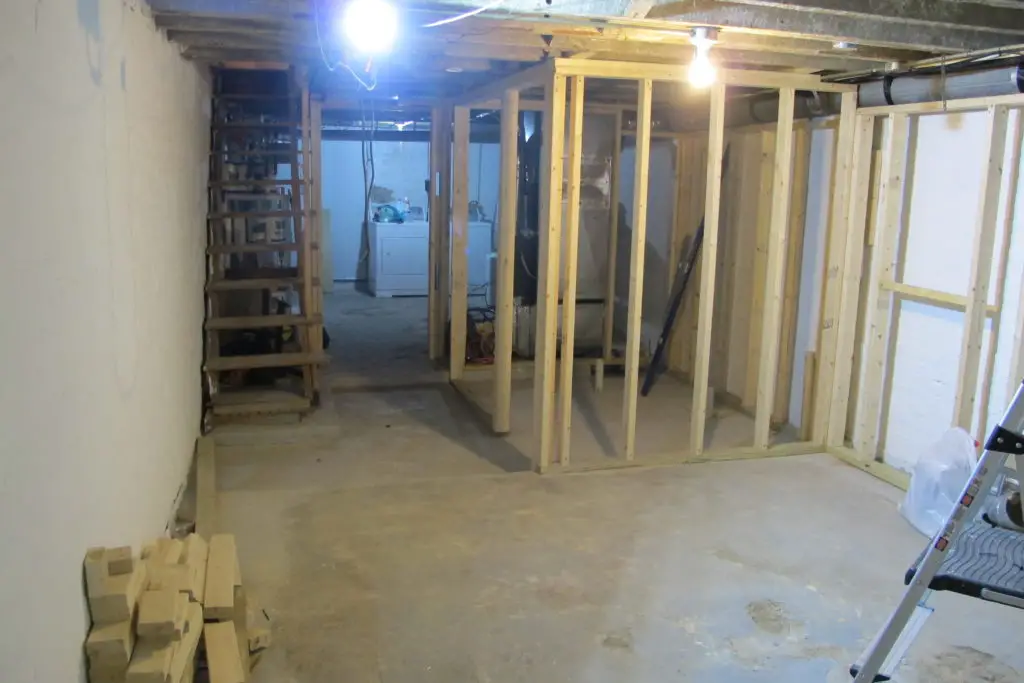
Had it not been for the exposed beams, the HVAC system, a sunken entryway, drains, and other quirks that had to be framed around, we totally would have tackled the project ourselves. But I can’t tell you what a joy it was to come home after just one day of work to find the entire space framed out perfectly.
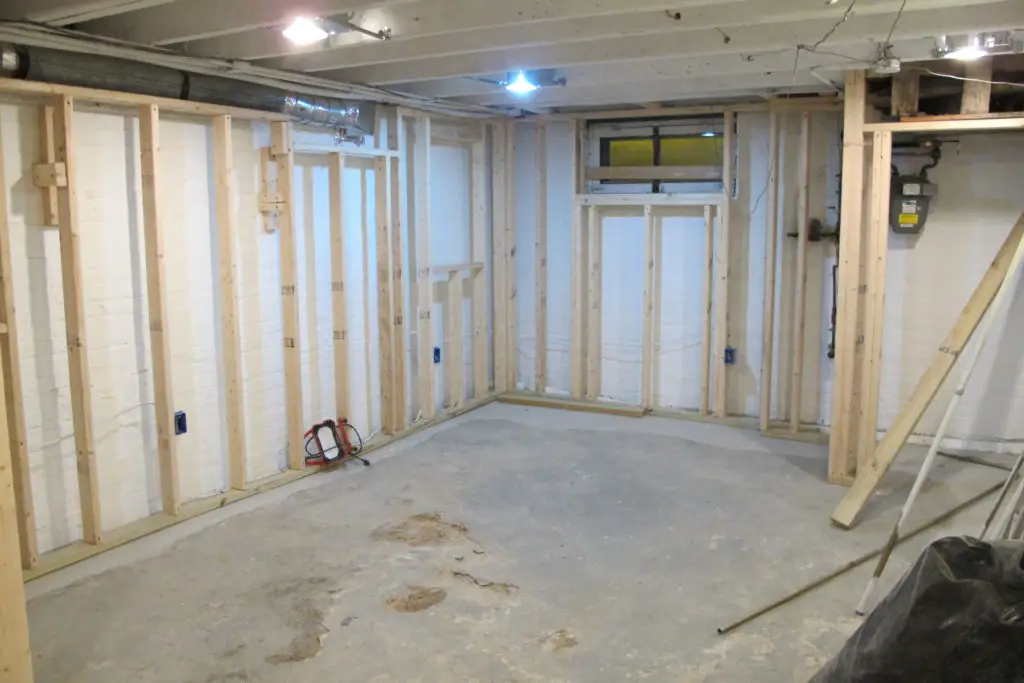
Once the framing was complete, we could move on to lighting. But before any electrical wires showed up, there was one significant change that contributed greatly to lighting the space: painting the ceiling white.
Before we embarked on the basement project, I knew that I wanted the century-old beams left exposed. Eric, however, was more than skeptical…
Thankfully, Eric trusts me (most of the time), so the beams were primed with an oil-based paint from Sherwin Williams. But when a topcoat of latex paint was applied, all the awful stains (100+ years worth) started to come through. So it was back to a third coat of the oil-based primer, which worked beautifully, and that is how we left it. So moral of the story: use oil-based paint.
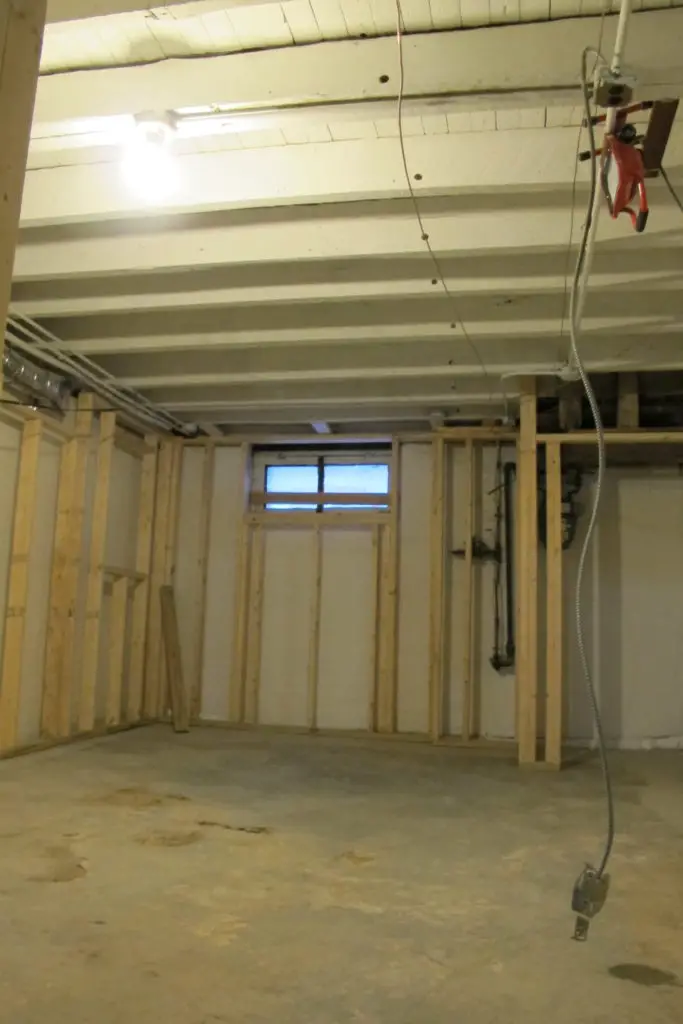
One thing neither of us had any doubts about was the lighting. And by that I mean that we both knew that lighting was not something we were going to skimp on. In its original state, the basement (stairway included) only had two lights. And by two lights, I mean two light bulbs. Nothing more. Any task other than simple laundry nearly required a headlamp.
Very nice. I want to paint my basement ceiling as well. I’m thinking white, to make it brighter, but my spouse is thinking black. Why did you choose white?
Hi Todd! I also debated between black or white. We went with white because the basement ceiling was overall low and I wanted the space to seem bigger and brighter (with only one small window). Personally I loved the white once it was done, but I’ve seen some amazing pics of black floor joists (as a basement ceiling).
Hello and thanks for sharing! We are planning a basement renovation and also plan to just paint the ceiling rather than trying to drywall around the systems and losing precious headspace. Did you use regular can lights? And if so, were you able to paint them so they blend in? I’m not finding options that seem designed to be exposed rather than tucked out of sight behind drywall. Thanks!
Yep! Regular can lights but the opening of the hole was taped off prior to spraying/painting the entire ceiling. I was super happy with how well they blended in. It’s obviously an industrial look but they are the exact same color as the ceiling so they don’t really stand out. Good luck with your reno!
Hi!! How low is your basement ceiling? Ours is really low, around 6 feet which has made me feel like it’s not usable but looking online is giving me hope and was curious about yours! Thanks!
I think we were right around 6’6″ to 6’8″ to the bottom of the beams.
What brand of can lights did you use and where did you get them? My hubs his having a hard time finding can lights that can fasten between our exposed basement beams.
I think they were Halo brand but we’ve since moved so I can’t say for sure. Try searching for new-construction recessed lights specifically (which will have the arms that reach out to attach to beams on either side).