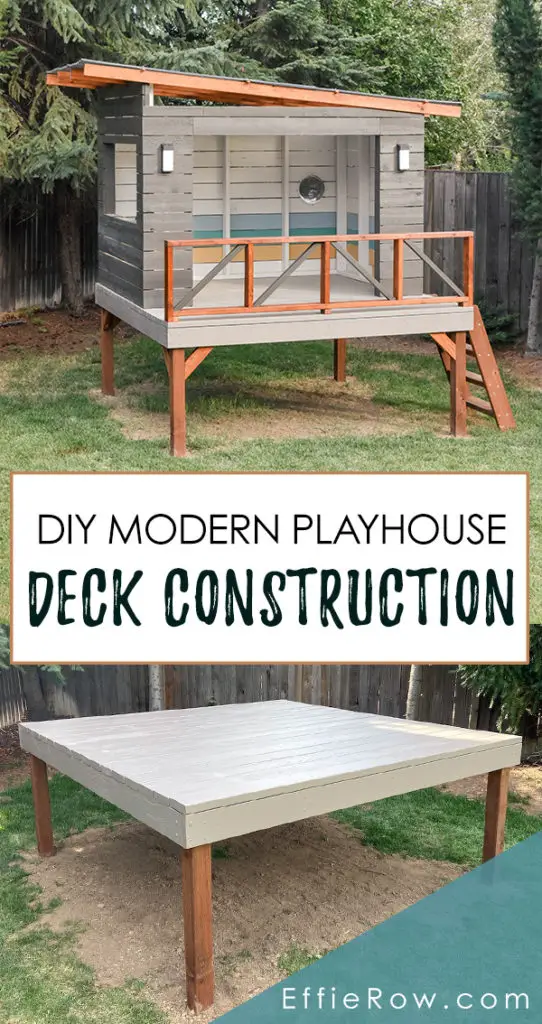
The first step in building our DIY modern playhouse was constructing the deck. When building a playhouse deck, squareness and levelness are next to Godliness.
DISCLAIMER: This post contains ads and affiliate links. At no additional cost to you, we may receive a commission for purchases made through these links and ads.
During the design process, the deck somewhat dictated the size of the actual playhouse. My goal was to limit the number of cuts I had to make for the deck boards. So I picked a common board length (in this case, stud length at 92 5/8″) which became the width. The length was a little more arbitrary and wound up being 8 feet.
We used the following materials and tools to build the playhouse deck:
- 18 – 2×6 @ 92 5/8″ (gray boards in the photo below)
- 1 – 2×4 @ 92 5/8″
- 5 – 2×6 @ 93″ (black boards in the photo below)
- 4 – 4×4* pressure treated @ 48″ (brown boards in the photo below)
- 8 – 2×4 @ 21″ w/ 45° inward angles each end
- 50 (approx) – 3.5″ lag screws
- 180 (approx) – 2.5″ deck screws
- 2 – 50lb bags of quick setting concrete
- Kilz oil-based primer
- Valspar exterior latex paint (satin finish)
- Shovel
- Miter saw
- Impact driver
- Cordless drill
*If I had to do this over again I’d probably use 5×5 pressure treated boards. Don’t get me wrong – this deck is sturdy and solid, but I didn’t know at the time that 5x5s even existed.
DISCLAIMER: This post contains a description of our building process. I cannot make guarantees regarding the safety of this play structure. Before building, please consult with a professional regarding materials and weight limits.
We didn’t plan for the extra 2×4 on the deck surface, but our toddler was a little freaked out by the spacing between the boards. So we added the extra 2×4 to make the gaps smaller.
It may have been a little OCD of me, but I primed all the cut boards (aside from the 4x4s) with oil-based primer before building. Since we didn’t use cedar, priming the boards before building was my attempt at making the seams more weather resistant. I also put a coat of the latex paint on surfaces that would be hard to reach once assembled (between the deck boards).
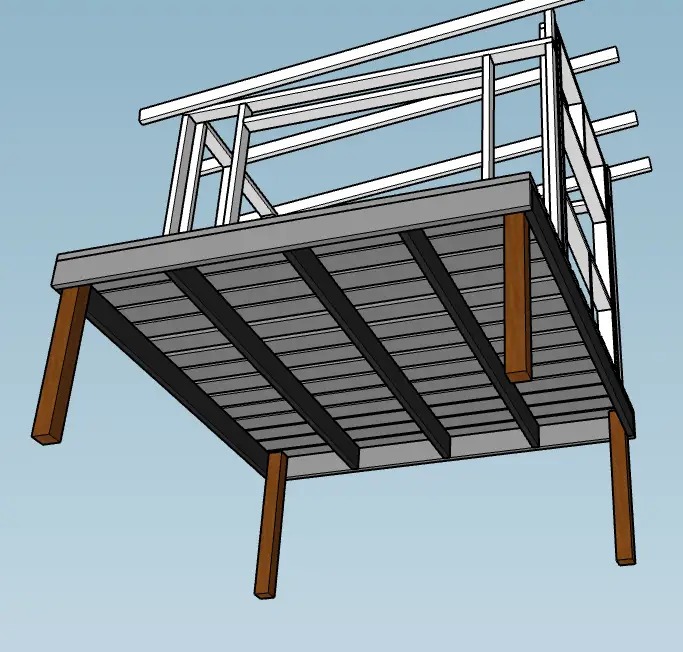
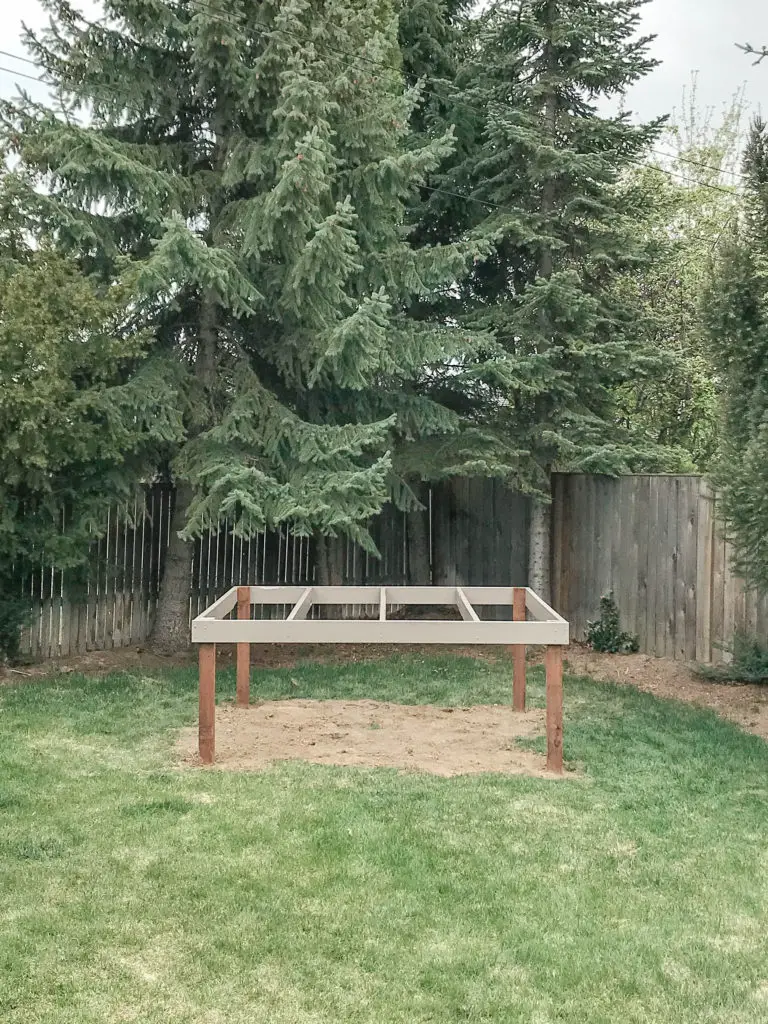
Constructing the deck was relatively straightforward. We first built the outer box using 3.5″ lag screws (drilling pilot holes first to prevent splitting). The stud length 2x6s were on the outside (front and back) and the 93″ 2x6s were on the inside (sides).
Next, we attached the 4x4s in the corners. Eric and I went back and forth on the topic, but I finally convinced him to build the base upside down.
In regards to the picture below – this probably should have been done on a flat surface (like the flat concrete pad behind us), but Eric was working quickly and opted to slide an extra board underneath to keep the surfaces flush.
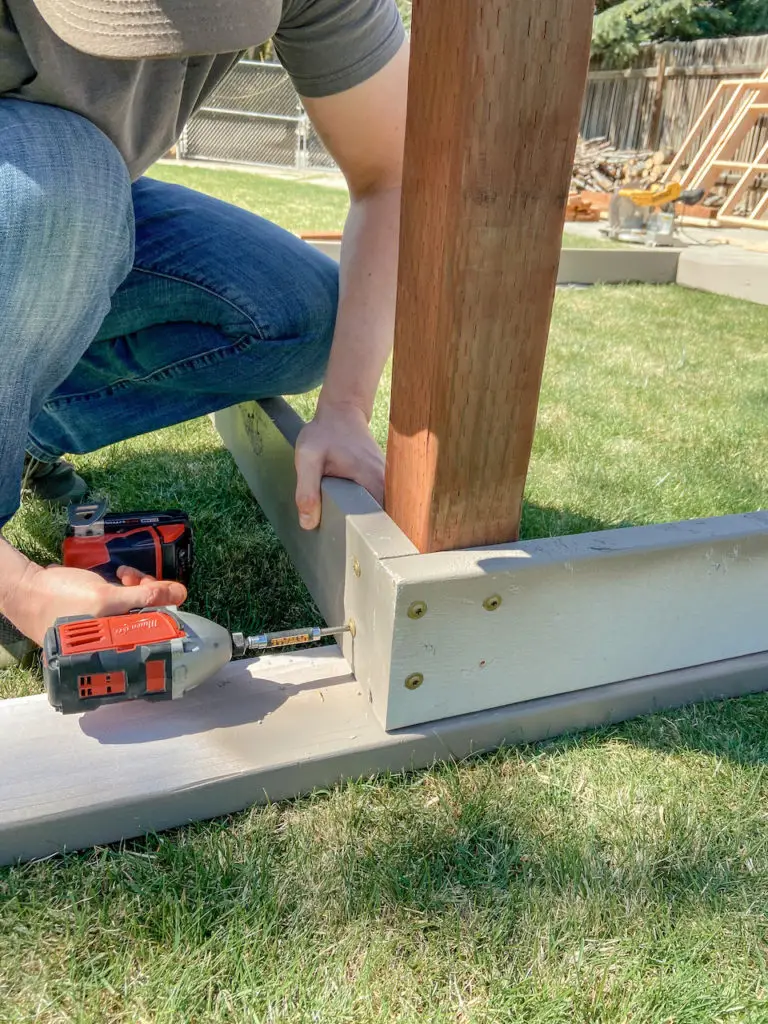
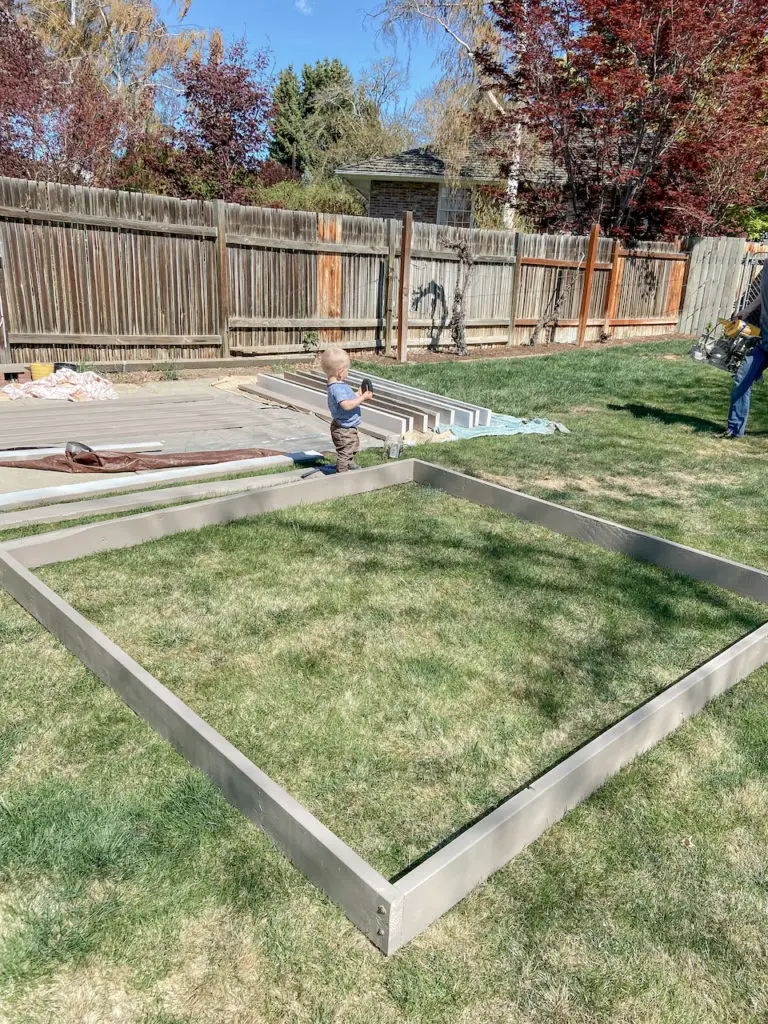
After the 4x4s were secured to the 2x6s with lag screws (2 in each direction), we flipped the whole thing over.
Once the deck was in the location we wanted it, we made sure it was square and then marked the ground around the posts. Then we moved the structure out of the way so we could dig holes (approximately 12″ deep) for each post.
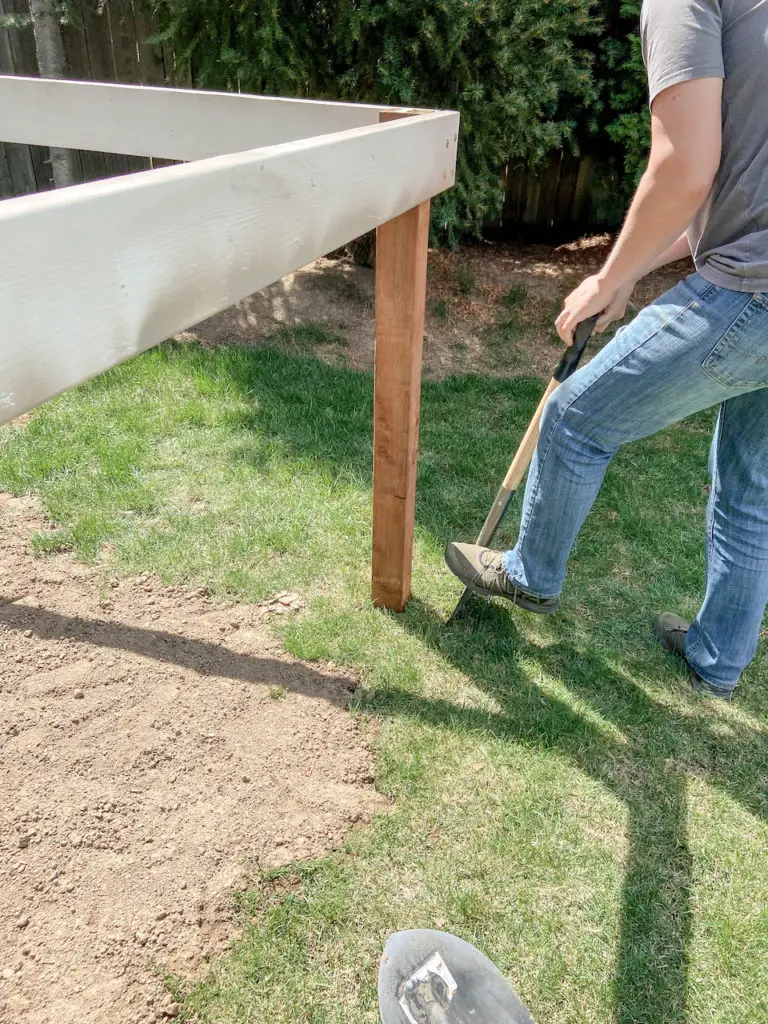
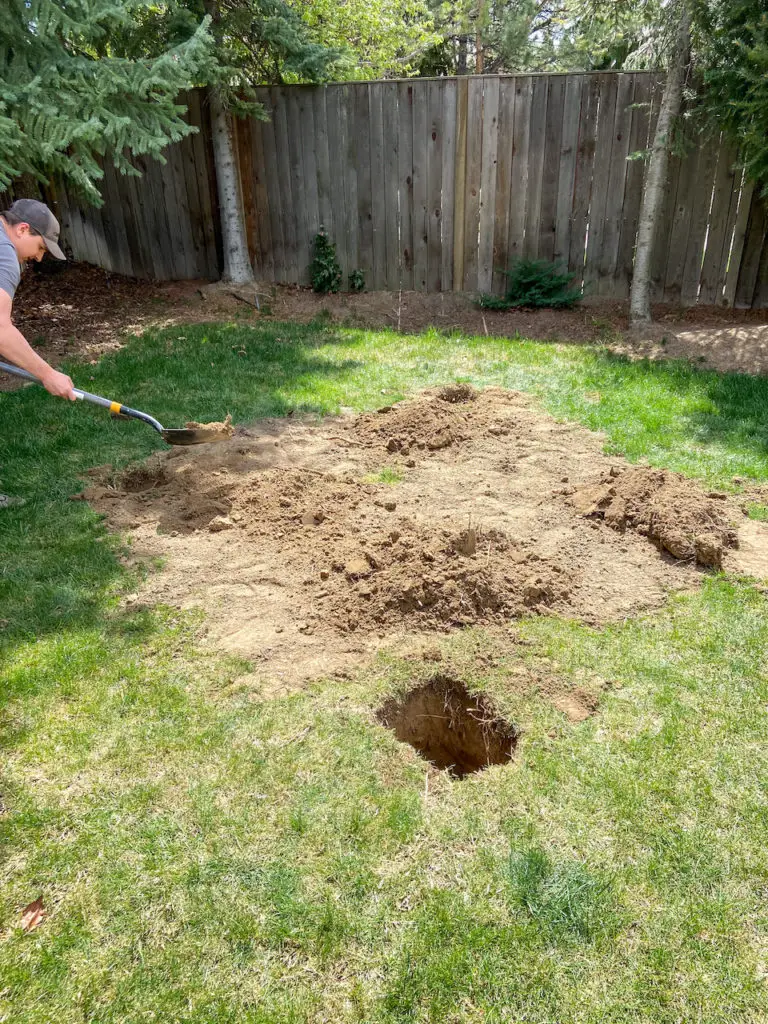
After the holes were dug, we set the deck base in place and backfilled the holes with dirt to get the frame level. Then we filled each hole with 1/2 bag of concrete mix (+ water) and more dirt. Our deck was approximately 3 feet high when done.
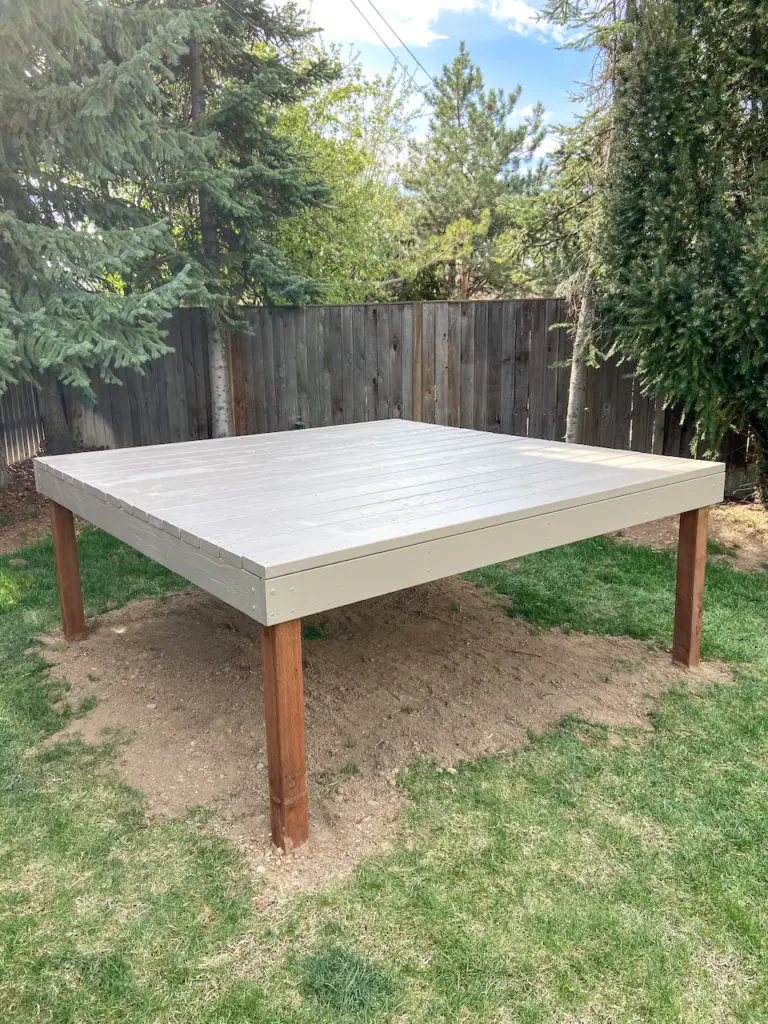
After the additional 93″ 2x6s were installed with lag screws (2 on each end), we placed the deck boards (stud length) on top. It was at this point that we realized the gaps between the boards were a little too wide for E. So we added an additional 2×4 to bring things closer together. We used a chalk line to mark the location of the supporting 2x6s and Eric installed the boards with decking screws.
If you’re wondering about the diagonal supports in the final photos – those were added after the walls were built. We used 21″ 2x4s, with 45° cuts on each end. One end was attached to the 4×4 with a countersunk lag screw. The other end was attached to the perimeter 2×6 with several deck screws.
Once everything was secured I added two coats of paint to the deck surface. We built the deck on a weekend and let the paint cure during the week before building the playhouse on top.
Approximately how much did you spend on material to build this?
Hi! I’ve since created a cost breakdown post – https://www.effierow.com/creating/cost-breakdown-diy-modern-playhouse/
This is very cool
I have a sloped hillside
Wonder if it would work
Do you sell plans
It could definitely be done! I don’t sell plans at this time – I’m just sharing our process in as much detail as possible for others to learn from.
Totally want this! I also have a sloped backyard. The great thing about this design is after the kids grow up you can still use it as a covered outdoor lounge area. Cool hangout for teens.