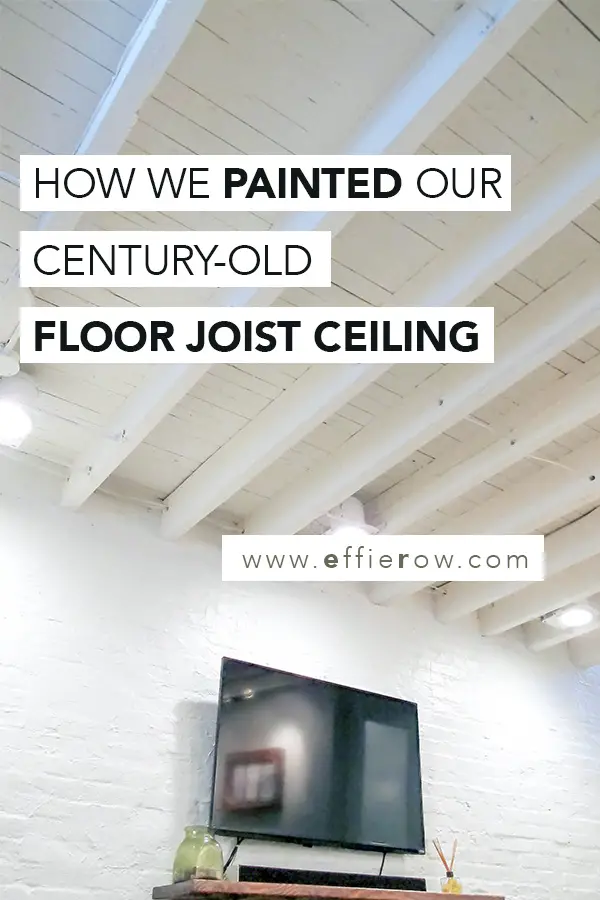
In our shallow, century-old rowhome basement, painting the exposed floor joists was a great way to renovate the space without dropping the ceiling height.
DISCLAIMER: This post contains ads and affiliate links. At no additional cost to you, we may receive a commission for purchases made through these links and ads.
It’s been a few years since we have moved from our Baltimore rowhome, but it seems that our basement renovation is continuing to inspire others (10k + repins on Pinterest and counting!).
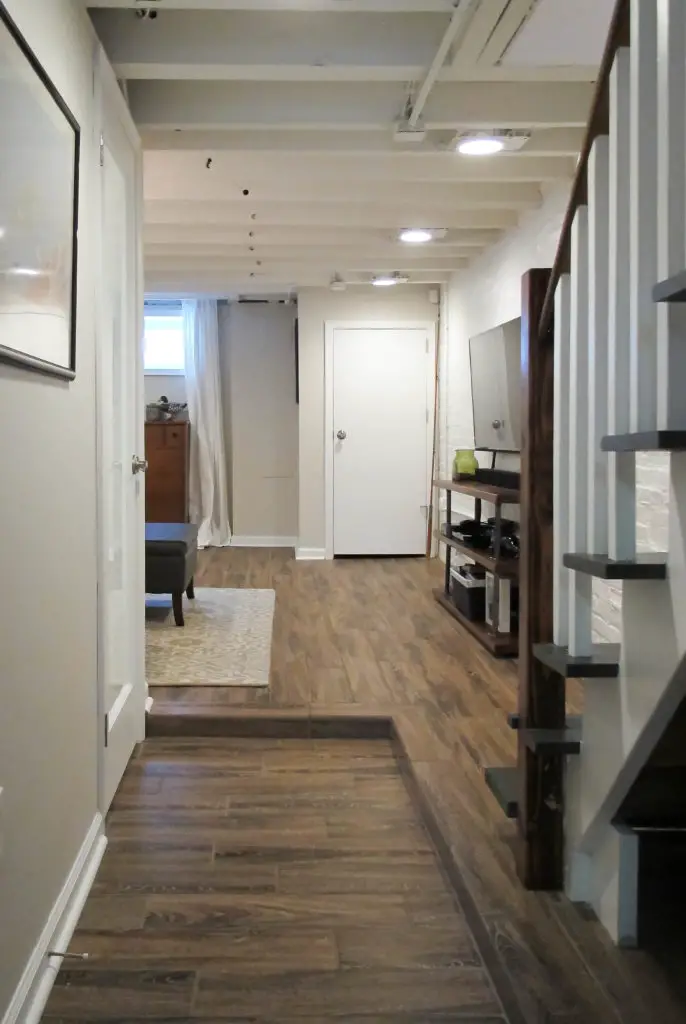
If you’re not familiar with the project – we converted our 1904 rowhome’s dark and dingy basement into a bright and welcoming living area + bathroom:
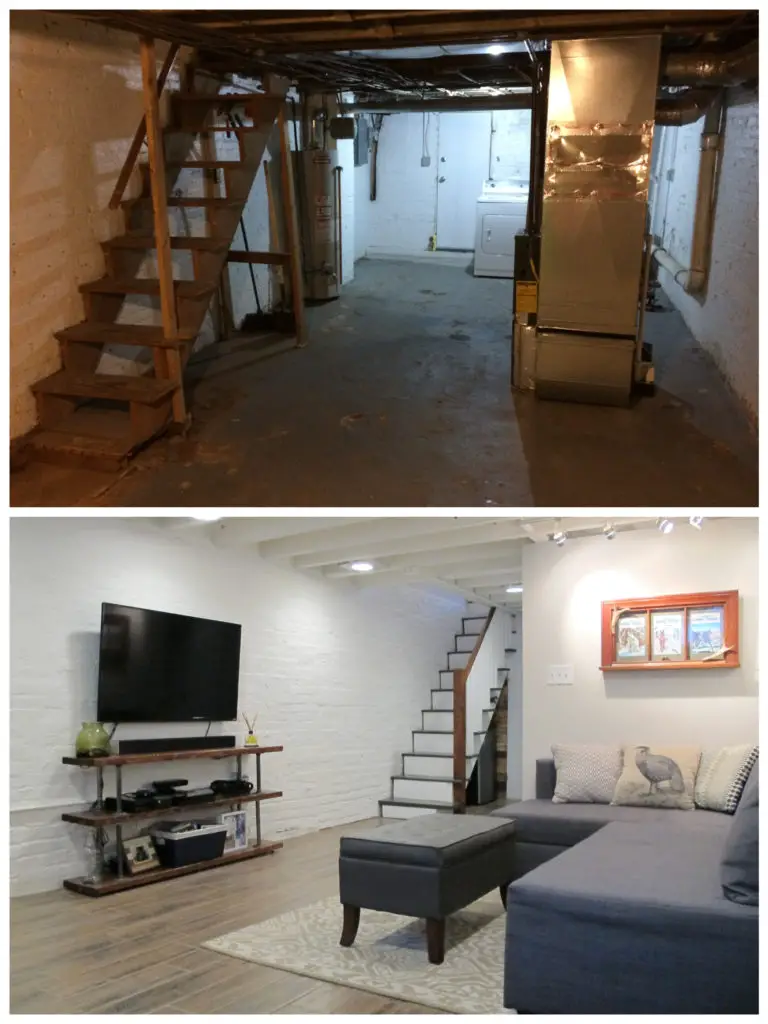
There are many beloved features of our basement renovation, but one in particular (for me at least) is the exposed floor joist ceiling. The basement depth is around 6’9″ to the bottoms of the beams, so leaving everything exposed makes the room feel more spacious.
When planning the basement renovation, I never intended to cover the floor joists (with drywall or drop ceilings). But for whatever reason – few contractors were convinced paint was the right choice.
Finally, our eventual contractor was on board with painting the exposed ceiling and even suggested white (whereas I was willing to paint them black to hide stains)! The result was nearly flawless (IMO), and we repeated the process in the laundry room for a cohesive look.
Materials Used
- Bucket with warm water and a few drops of sal suds
- Shop rags
- Paint roller
- Rough surface roller covers
- Paintbrush
- Sherwin Williams Fast Dry Stain Blocking Primer (Oil Based)
- Airless Paint sprayer
SHOP THE POST –

Project timing-
Our ceiling was painted early in the basement renovation process. The painting was done after the drywall went up but before the lighting was finished.
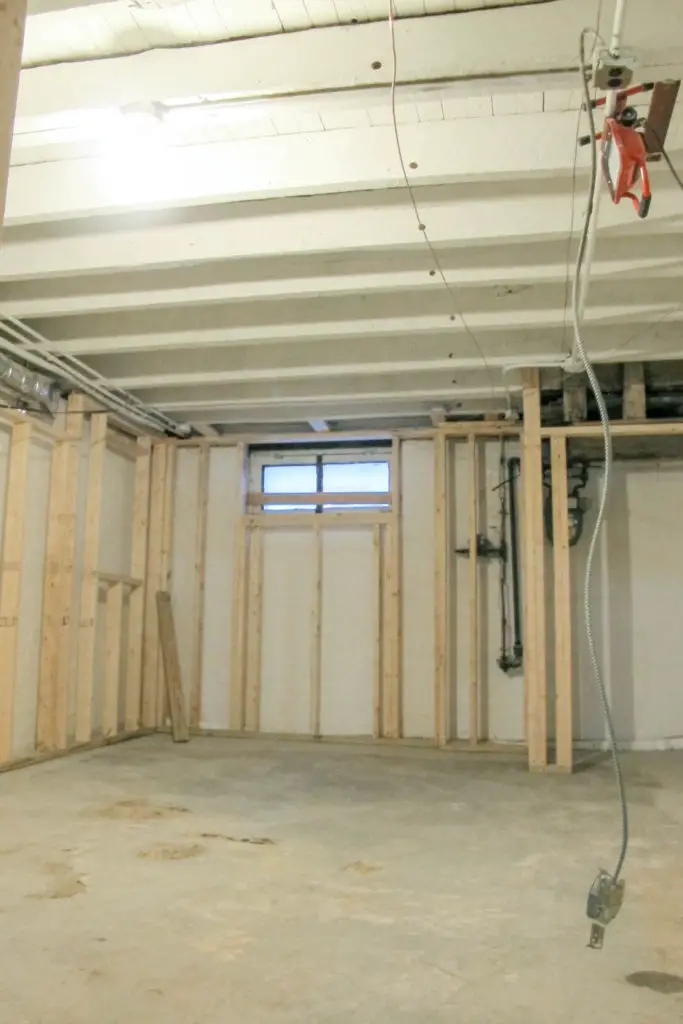
Prepping the beams and joists-
The first step was removing the excessive cobwebs and dirt that had accumulated over the years (decades!). We cleaned up the beams and joists with a wet rag to minimize any dust from the existing paint (just in case it had any lead in it). In most areas, the paint wiped away easily. If it didn’t – we just left it. We cranked up the dehumidifier in the basement and let everything dry for a couple of days.
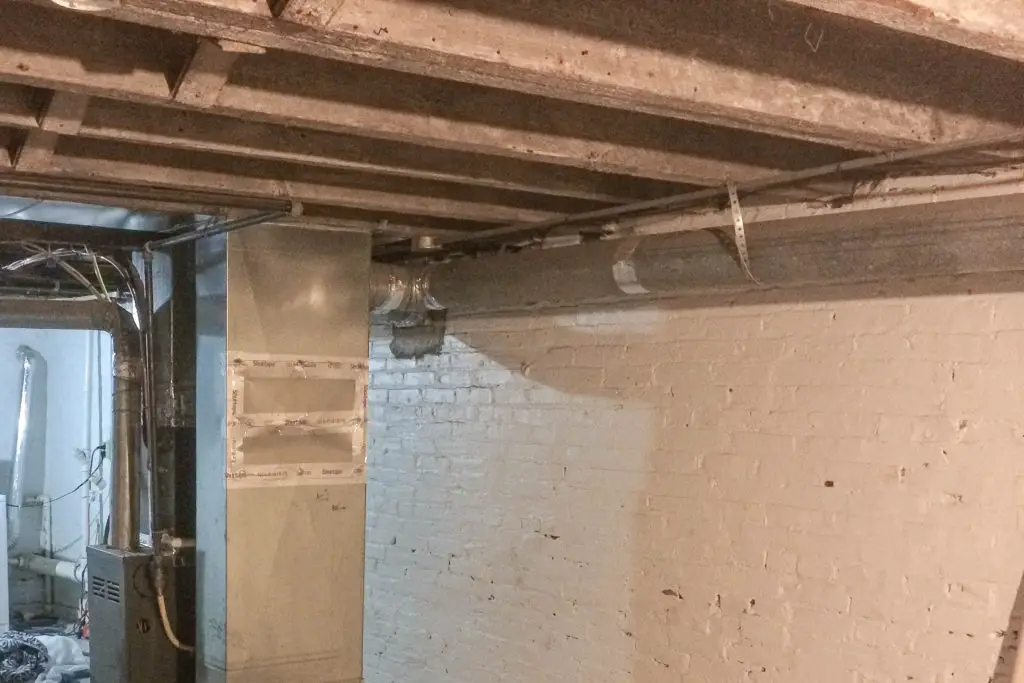
Applying the first coat-
The first coat of Sherwin Williams Fast Dry Primer was applied with a brush and roller. This might be surprising to some, but with old and rough beams, we had to work the paint into the imperfections. This process made a lot more sense when we tried the sprayer-only method in our laundry room – we were left with 5 o’clock shadows everywhere.
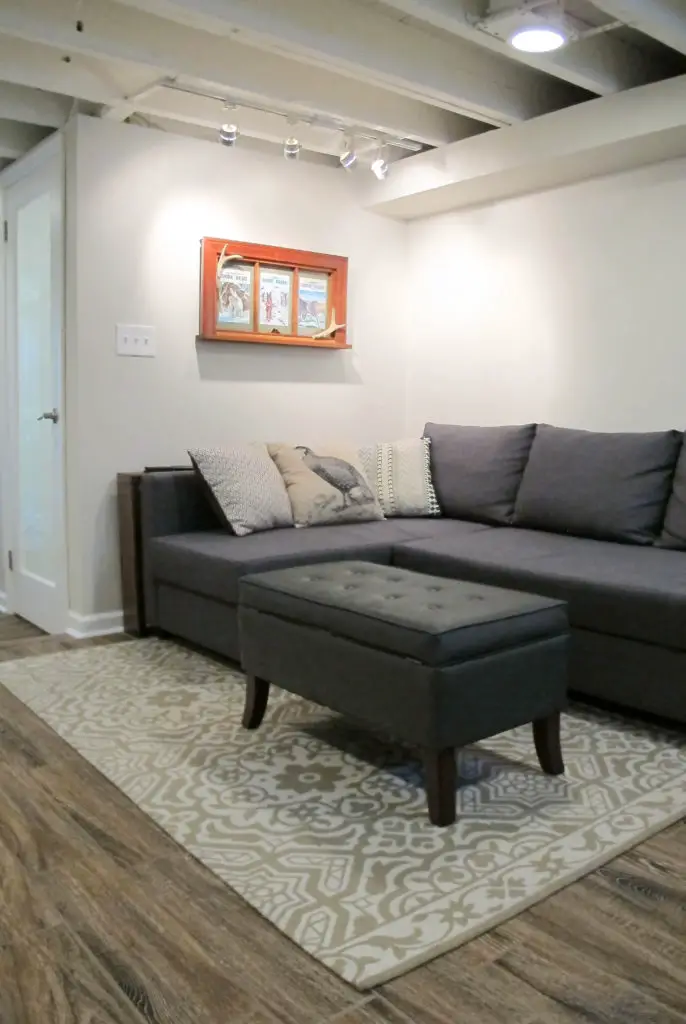
Painting the final coat(s)-
The 2nd coat of paint was applied with an airless sprayer. Similar to the first coat, it was tedious to cover all surfaces and get into the corners.
We likely could have been done after the 2nd coat, but we had planned to apply a final coat of latex paint. However, after applying the latex paint, the stains and tannins from the wood started to seep through. So – it was back to a final coat of the oil-based primer.
Painting the recessed lights and conduit-
The recessed/can lights were installed after the final coat of primer was applied. After they were in place, the openings were sealed off and a quick coat of paint was given to outside of the can lights and the conduit. This helped us avoid any shadows. The oil-based primer adhered wonderfully to the metal surfaces.
What we’d do differently-
If anything we likely could have saved a few bucks by using Zinsser’s Cover Stain oil-based primer (which we have since used with other projects). Other than that we wouldn’t do things much differently the second time around. We love the way our exposed floor joist basement ceiling turned out and we would highly recommend it as a basement renovation option (especially for those with low ceilings).
LOVE the finish look. I’m thinking of doing the same to my basement in Philly. It looks very similar to your space. It’s about 392sq ft. I’m getting quotes for 14k-14.5k. Does that sound similar to your price?
Thank you! I went to school in Philly 🙂 14k-15k sounds like a decent quote to me. Our space was around the same size and including the bathroom (w/ below-grade plumbing) and french drains, I think we paid around $21k. So worth it though to have the extra liveable space and for home value!