Our basement remodel was an investment of time and money. But the outcome was worth it and more! We now have a bright and clean, yet cozy and comfortable space that adds to our home in so many ways.
DISCLAIMER: This post contains ads and affiliate links. At no additional cost to you, we may receive a commission for purchases made through these links and ads.
The truth is, we’ve been so busy enjoying our new basement space (and planning a wedding and other ‘minor’ things like that), that it’s been more than a year and I’m just now getting around to showing you all the finished product!
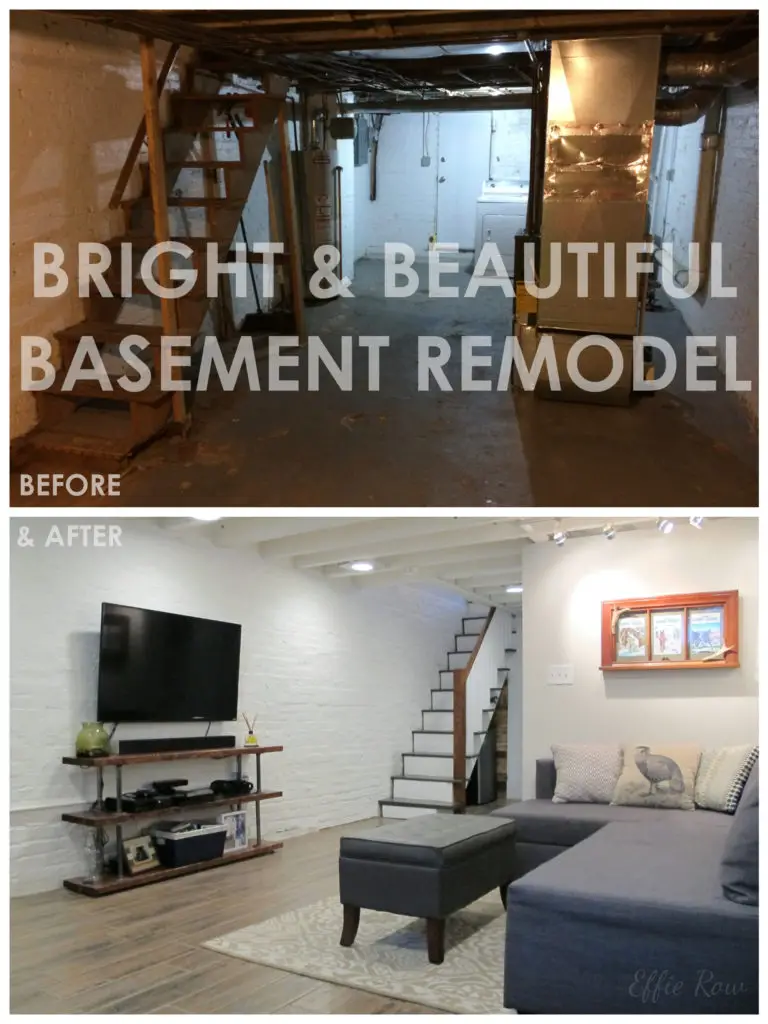
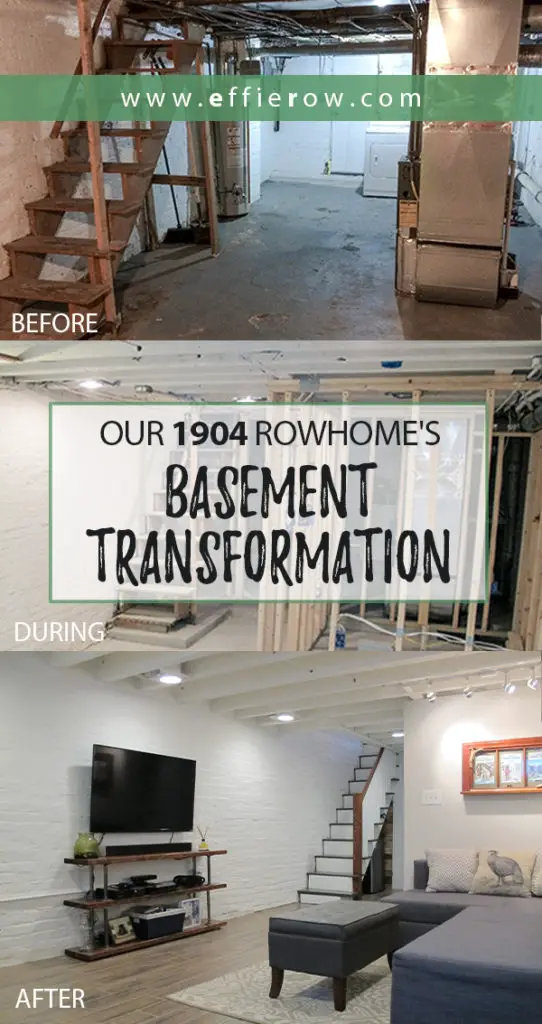
First, let’s have a quick reminder of what our basement looked like before the remodel:
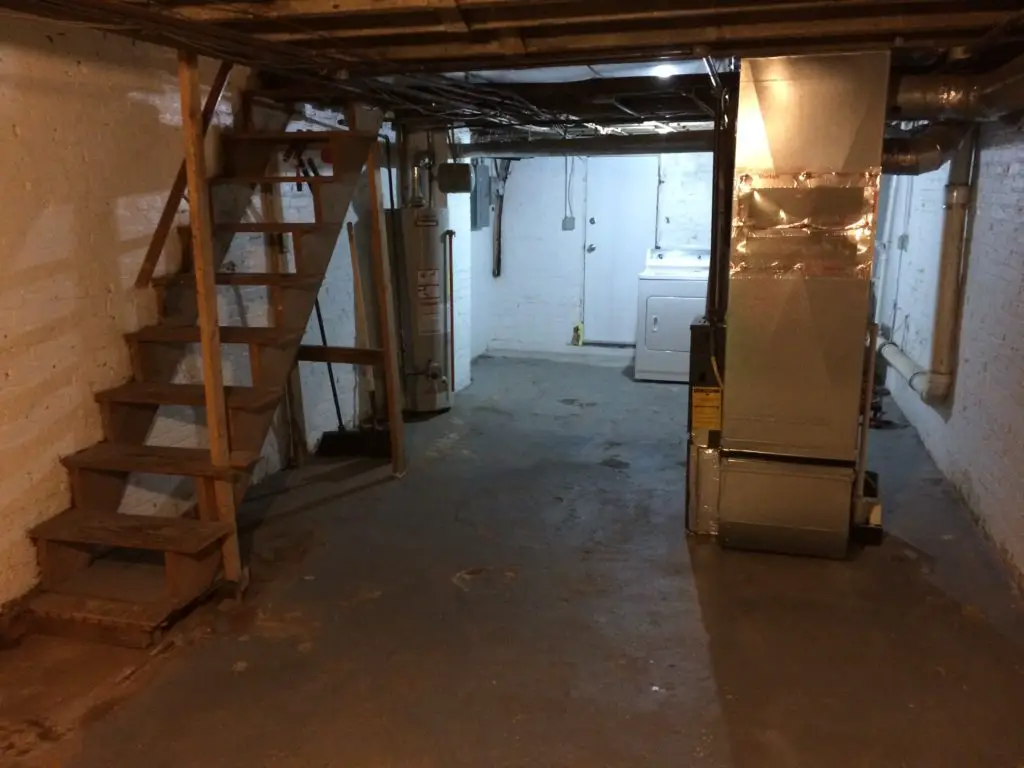
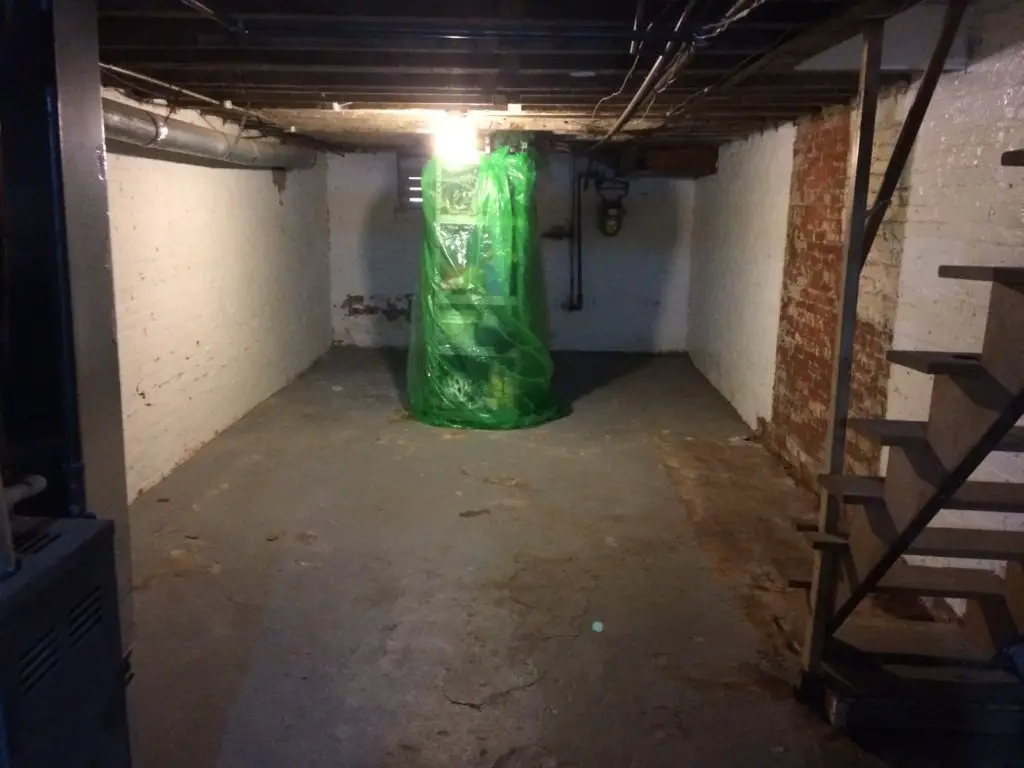
Scary, right?! Like how on earth could that possibly become a usable space? Let alone an inviting space? But it happened, and I have proof!
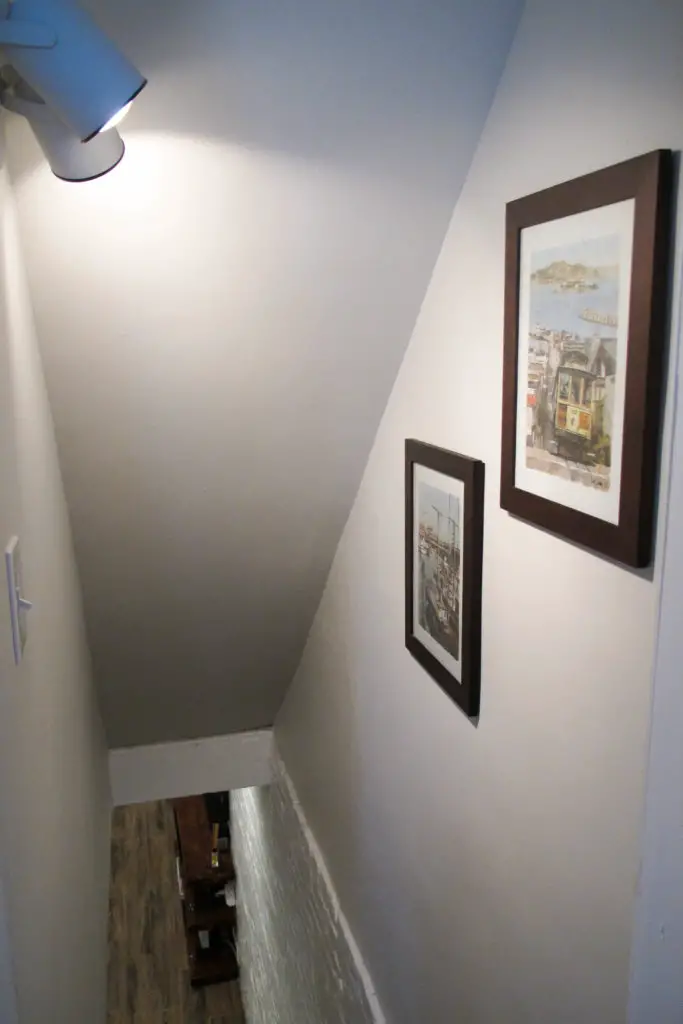
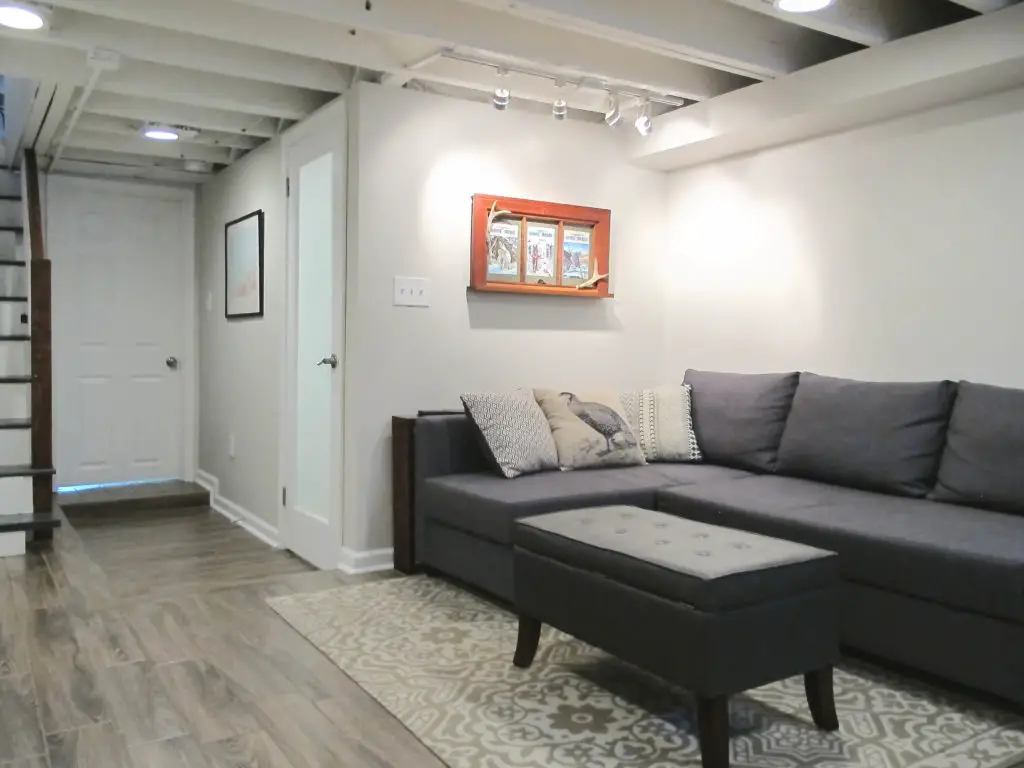
The basement is entered via a narrow stairwell off of the kitchen. There was limited space for lighting and I opted for directional lighting on the wall vs. flush mount lighting overhead. The San Francisco prints were picked up at a thrift store and ($1 each!) and spruced up with some nice new frames.
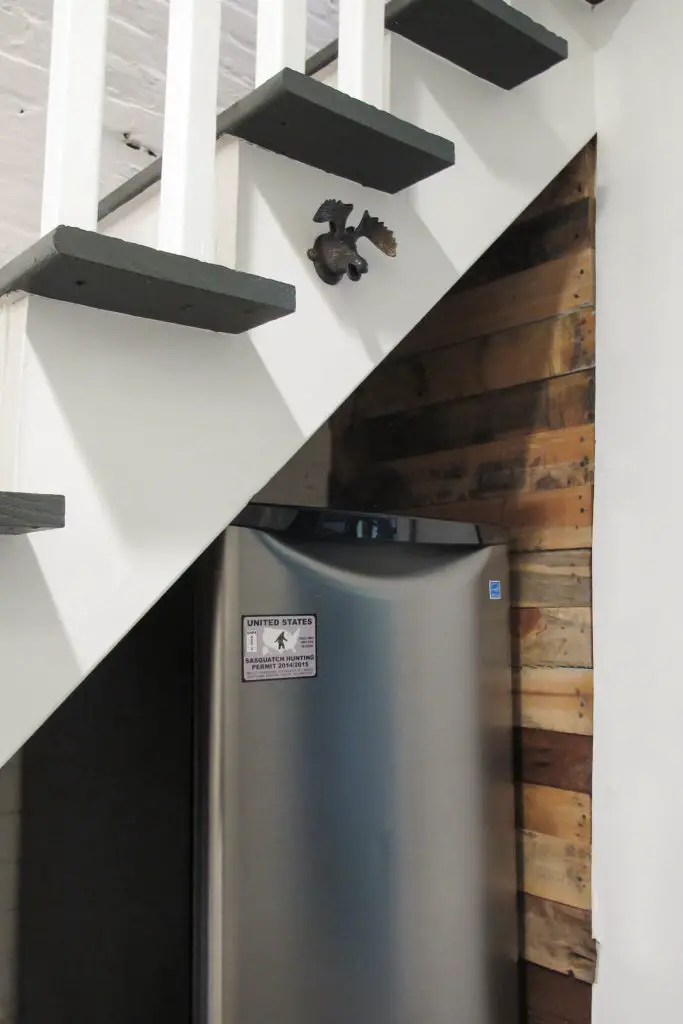
At the bottom of the stairs, you are greeted by some amazing faux wood ceramic tiles.
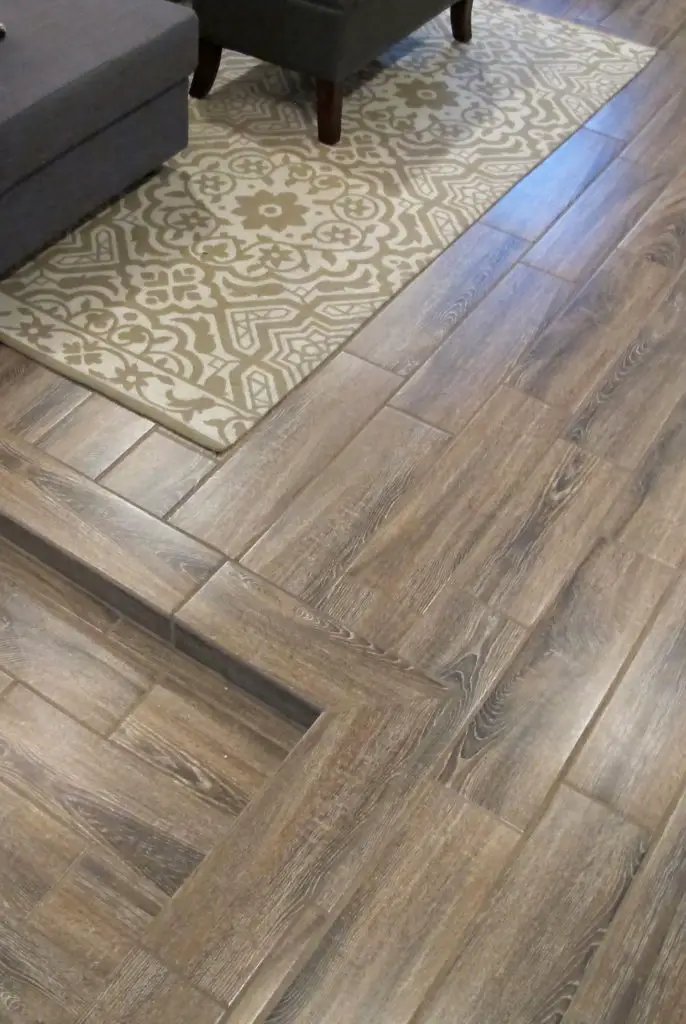
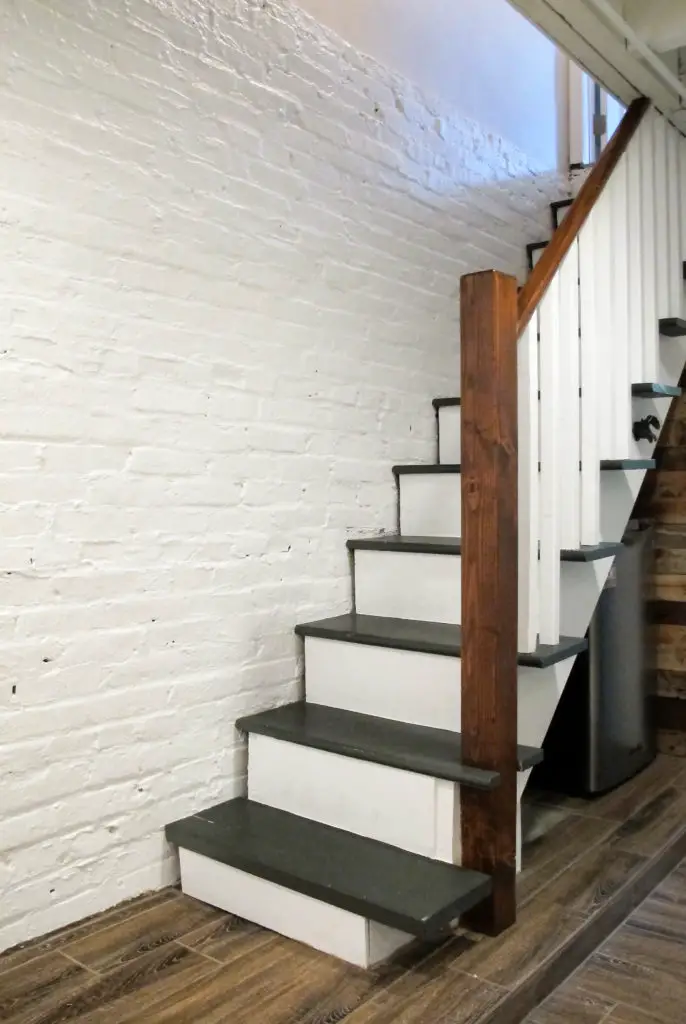
The basement has a mix of old and new. The faux wood tile floors are obviously new, but the stairs and exposed-floor-joist ceiling are original and were mostly spruced up with paint.
The tiny feature wall under our stairs was done with leftover pallets from our laundry room accent wall project.
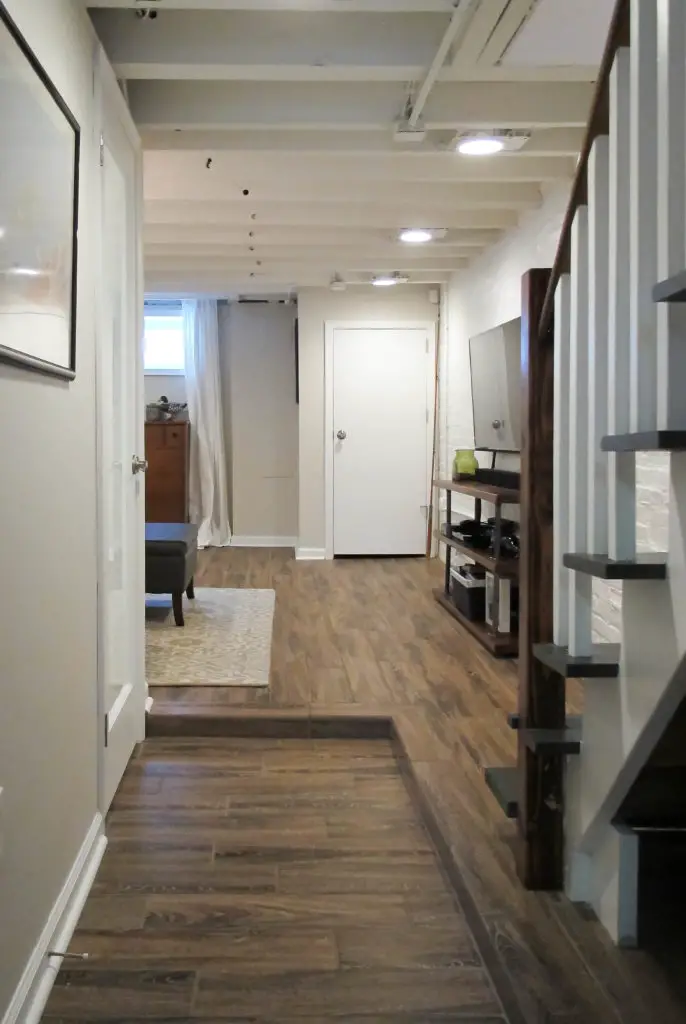
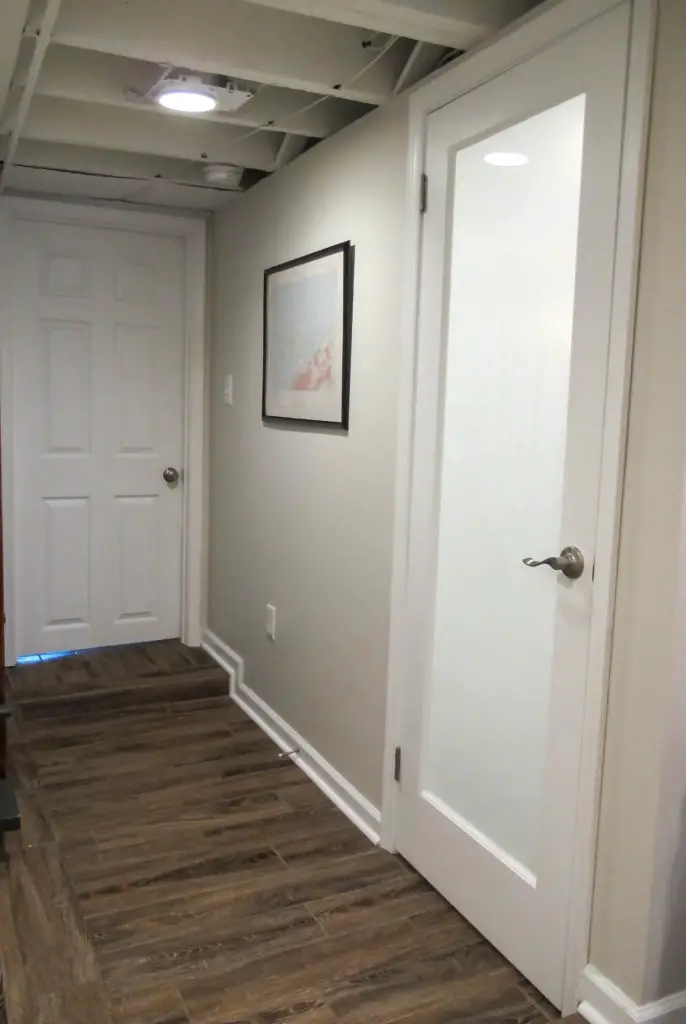
A major addition to the basement was a bathroom. Some may think it was a risky move, but I decided to install a privacy glass door. While it’s not an actual window, it helps to make the overall space feel more open (vs. a solid white door). At the end of the hallway (above) is our semi-finished laundry room.
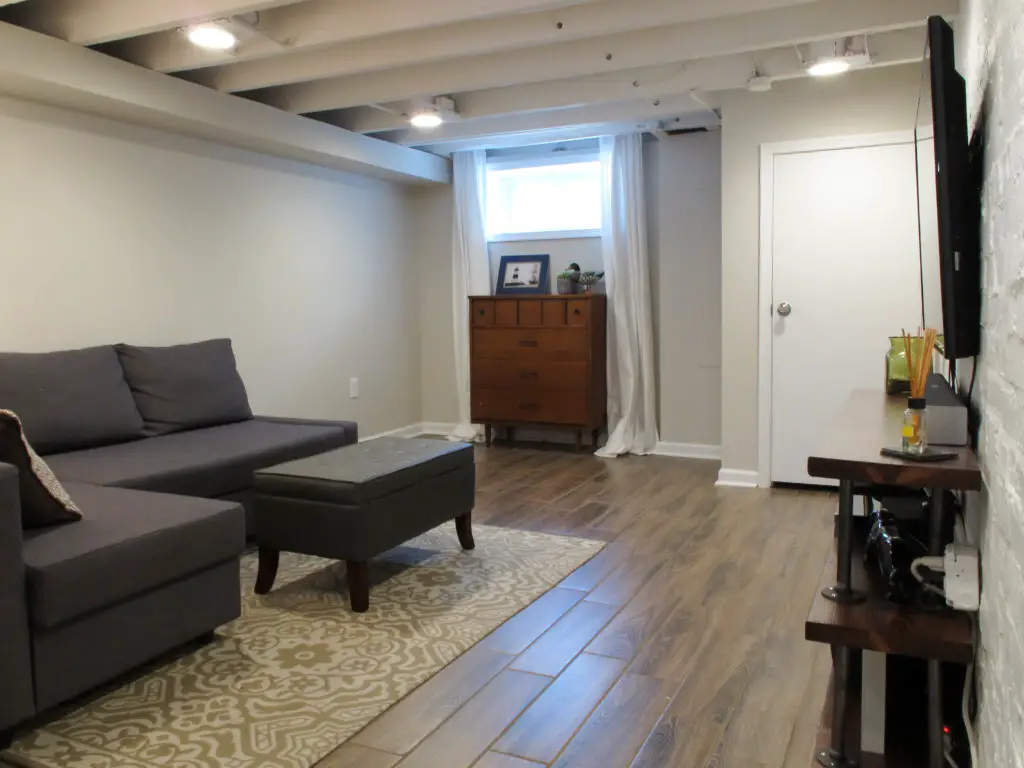

Many of the decorative pieces were items we had lying around or in storage. We bought a few new pieces of furniture but also built some media shelves (for the TV) and a sofa table that is tucked in between the wall.


Needless to say, but we are so happy with the final result of our basement renovation. It was a large project to take on, but we are definitely glad we did it. We get a lot of use out of the space and it has certainly added value to our home.
Every now and then we will be hanging out in the basement, and one of us will stop to remind the other one what the space used to look like…
- Tile: GBI Tile & Stone, Inc. from Lowes
- Grout: MAPEI sanded grout in ‘Mocha’ from Lowes
- Walls: Pale Oak by Benjamin Moore
- Brick Wall & Trim: Super White by Benjamin Moore
- Ceiling: Sherwin Williams ‘Fast Drying Primer’
- Industrial TV Stand: DIY
- Couch: Ikea
- Sofa Table: DIY
- Decor Pillows: Target
- Storage Ottoman: Target
- Area Rug: Target
LINKS TO ALL POSTS IN THIS BASEMENT SERIES:
Basement Bathroom Addition
Painted & Upgraded Basement Stairs
Basement Made Beautiful: Part 1 – Planning & Plumbing
Basement Made Beautiful: Part 2 – Framing & Lighting
Basement Made Beautiful: Part 3 – Flooring
Basement Made Beautiful: Part 4 – Finals Touches & Reveal
I love your basement renovation! Thank you for the inspiration as I plan to start finishing my basement soon. Where did you get the ceiling lights from?
Thank you thank you! The ceiling lights are just your basic new construction recessed lights from home depot. They got primed and painted with the ceiling to make them blend in. Best of luck with your reno! I definitely don’t regret painting the floor joists if that’s what you are considering.
OMG Kate, I saw this on Pinterest and was like “WOW this looks exactly like my neighbor’s basement.” And indeed it is… So funny! We miss you guys on the block 🙂
OMG! Hahaha I love it! Give my love to R-Unit!
Great job! What did you do with the machines? How do you heat and cool the basement?
Everything stayed where it was. The HVAC unit pretty much determined how we divided the space (between the finished and unfinished half). We did not extend any ductwork into the basement because it stays nice and cool in the summer. In the winter we ran a small space heater. One thing we had running at all times was a dehumidifier though.
I LOVE your tile. I’m looking for a tile to install in my basement following some unfortunate water issues a couple weeks after moving into my new home and tearing up the new carpet. I looked on Lowe’s and that tile looks a bit lighter in their pictures. Is there a certain shade ?
Thank you! There was no specific shade for it that I’m aware of. To be honest I’m not sure they even make this tile anymore. Good luck with your project and congrats on the new home:)
Good job. It looks lovely. Did you seal the floors and grout? It seems to have a shine and I’m wondering if there is a satin finish seal since it don’t appear Matt or high gloss.
Thank you! No seal on the floors or grout (although sealing the grout is a good idea). The tiles had a nice satin finish to begin with.
This is not picking a VERY NICE renovation. I think I would run TV cables through a piece of plastic drain pipe either white to blend in with wall or center a piece of black in the rear to appear as a fifth leg. If anybody tries this idea make sure to oversize the pipe to fit not only the cable but also the terminal fittings. Good looking job and nice report even though delayed by a distraction or two. 🙂
I stumbled on this on Pinterest, you posted that you used fast drying primer on the ceiling. That’s all you used? No paint over it? How many coats did you put on? Thanks so much!
Yep! Only fast-drying oil-based primer.
After the first coat of primer we tried applying a latex ceiling paint, but all the old stains started to come through. So we went back to the primer. I think one of the biggest tricks to getting a nice finish is first rolling the paint on (to get into all the imperfections), and then spray the final coat on.
This is very nice. Without furniture and decorations, what was the cost of remodeling?
Thanks! Rough estimate…$20k. But keep in mind this included below-grade plumbing work.
I would love to know how you refinished the stairs. Did you paint the original stringer and replace the treads? If you painted your treads I would love to know how they are holding up. We are renovating our whole house and your basement is my inspiration for our next huge project!
http://www.usagainstthehouse.com
You’re too kind! While we lived in the house the paint on the treads held up great and cleaned up very well. We used Sherwin Williams Porch & Floor Enamel that we had leftover from our laundry room. I wrote a brief post about the stairs – https://www.effierow.com/creating/painted-upgraded-basement-stairs/
P.s. I’m already loving your site:) I love seeing row home renovations!
I’m planning to remove my drop ceiling and leave exposed with white paint. Do you think it’s loud because you don’t have any insulation?
You will definitely hear people walking and talking (muffled) above. We expected it so I never really thought much of it after the fact.
Our duct rubs directly through our basement. Did you paint your duct too?
The air conditioning ducts were enclosed in a framed soffit but we had other exposed pipes and wires that we painted with the same ceiling paint. On the otherwise of the basement is the laundry room which has a ton of exposed ducts, pipes, and wires. You can see what everything painted looks like here: https://www.effierow.com/creating/laundry-room-overhaul-part-1-dark-and-drab-to-bright-and-fab/
We have purchased an older home with low basement ceilings. Can you tell me the height on these ceilings. We will be leaving open ceiling and the height is only 6’ 5”.
Thank you.
We are no longer in the house but I think ours was deeper only by a couple of inches. I think we were right around 6’6″ to 6’8″. 6’5″ is on the shorter end but I’d still go for it because the exposed ceiling will make it seem more spacious.
Hi Kate!
The basement is awesome! Love what you guys did. I myself am looking to buy a house with a similar basement situation and am finding so much inspiration from yours!
I have a question about painting the walls – I know you used about 5 gal of primer for the ceiling, but what about the exposed walls (behind the tv)? did you just put on a couple coats of primer? did you use any paint?
Hi Matt – thank you! The brick wall was primed with interior latex primer and then we used a satin interior latex paint.